-
Casters
▾
-
Light Duty Casters Up to 350 Lbs
-
Medium Duty Casters Up to 1,500 Lbs
-
Heavy Duty Casters Up to 40,000 Lbs
-

Track Casters
-
Stem Casters All Stem Types
-
Stainless Steel
-
Pneumatic Casters Ait & Flat Free
-
Furniture Casters All Styles
-
High Temp Casters Up to 550 ˚F
-
Metric Casters
-

Leveling Casters
-
Spring Loaded
-
- Wheels ▾
- By Application ▾
- Accessories & Parts ▾
- Material Handling Products ▾
- Volume / Resale






















Installing Threaded Stem Casters

Plate casters tend to be the most secure way to secure a caster to item. Most mounting plates have 4 holes that allow you to mount it to your item. When there isn't enough room to utilize a mounting plate, there will usually be room for a stem caster. Threaded stem casters offer a great solution to securely mount themselves to item as it utilizes a nut or threaded insert. They require a bit more effort to install than grip rings or grip neck stem casters which can be pressed directly in (and pulled out); it's for that reason that grip neck and grip ring stem casters are designated for lighter duty applications.
Required tools
Caster Wrench

A caster wrench is a specially designed wrench for casters that allows you to turn/hold the swivel section of a threaded stem caster when there is no way to do so from underneath the caster. Casters that require the use of caster wrenches have an octagon shaped swivel section.
Wrench

Some casters have a bolt head underneath the swivel section that allow you to utilize a regular wrench from which the swivel section can be held/turned to allow the stem to be threaded into an insert or held to secure a nut on top.
Ratchet and Socket

A ratchet and socket are useful when you need to turn the nut on the top of stem to install/remove the caster. Alternatively you could use a wrench or a crescent wrench
Fastening Methods
Nuts and Washers

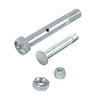
We recommend using a plain nut and split washer when fastening your caster to an item. This combination allows you to easily remove/tighten with hand tools. Alternatively, a serrated nut would be ideal as well. Lock nuts require a bit more effort to install/remove a caster because it requires more force to turn the nut after a few rotations.
T-Nut

T-nuts are meant to reside in wooden items where a pre-drilled hole allows the t-nut to be centered then its hammered into place. The teeth on the edges of the insert keep the t-nut from rotating in place. The t-nuts without any teeth have holes in them to allow wood screws to go through them for an even more sure insert.
Hollow Tubing Threaded Inserts

These inserts are designed for either circular or square tubing and allow you to attach your caster where empty space would be. These inserts utilize a spring clip to keep it from backing. We recommend using a mallet to tap it in or threading a regular bolt into the the insert and taping on the head of the bolt to place it inside. These tend to be difficult to remove once they're installed.
Installing Your Stem Caster Correctly

A correctly installed stem caster is mounted flush against the item. If your stem is visible underneath the item, it runs the risk of bending under the weight of the item its attached to or if it makes contact with other objects. The stem is designed to fasten the caster, not bear the load or level. There is a specific type of caster known as a leveling caster designed to adjust the height of an object. The swivel section of a stem caster (round/octagon shaped area where the stem ends) is designed to bear the load of the item its attached to.
Ideally, it's best to place the casters on the corner of the object to keep it from easily tipping over, but every project is different. For example, some projects may require you to hide/recess your casters. For these situations you need to make sure your caster is placed correctly to allow them freely swivel around 360 degrees with out making contact with anything else.
Final Thoughts
Need help with your next project or installation? Feel free to contact us or give us a call at 713-227-1144 for advice.
Also in Caster Knowledge

Measuring Threaded Stem Casters
Threaded stem casters can be difficult to measure. Learn how to measure stem diameter, length, and thread pitch for an exact replacement fit.

High Temp Dual Wheel Casters
Discover high-performance dual wheel casters built for low clearances, heavy loads, and extreme temperatures up to 425°F, with excellent rolling and swiveling performance.

CG-MAX Green Poly on Aluminum Caster Wheels
"No Compromise" Casters & Wheels: Discover how wheel diameter, tread shape, bearings, and floor conditions affect rolling performance, and why CG-MAX polyurethane on aluminum wheels deliver efficient, durable performance.


